Manage Requests
Manage Requests allows users to view, approve, and deny Absence, Missed Clock In, Missed Clock Out, and Timesheet Adjustment requests submitted by employees from Employee LINQ.
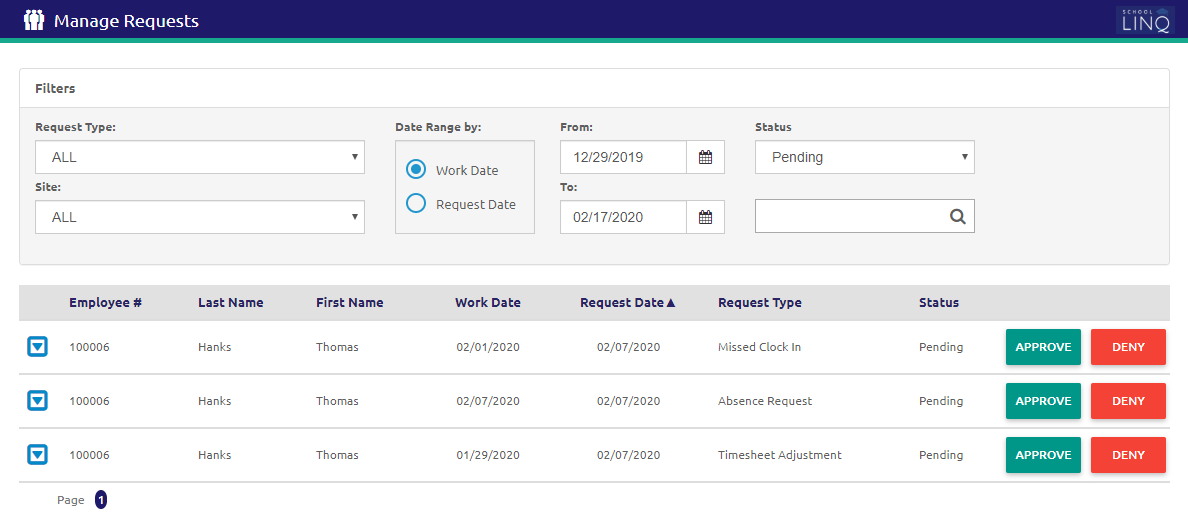
- Select a type of request from the Request Type drop-down list. ALL is selected by default.
- Select a site from the Site drop-down list. ALL is selected by default.
- Select Work Date or Request Date.
- Work Date is the date that is affected by the request.
- Request Date is the date the request was made.
- The Date Range is set to Work Date by default. Select Request Date to filter by request date.
-
Enter or select a date range using the Calendar feature in the From and To fields.
- Select a status from the Status drop-down list. Pending requests populate by default.
- Enter the Employee #, Last Name, or First Name in the
 field.
 - Click the
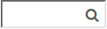
 icon to view read-only information about a request.
Approve Missed Clock Ins, Missed Clock Outs, and Timesheet Adjustments
The Missed Clock In, Missed Clock Out, and Timesheet Adjustment forms are similar.
- Click the
.png) button. A new form will display. The request information is read-only.
button. A new form will display. The request information is read-only.
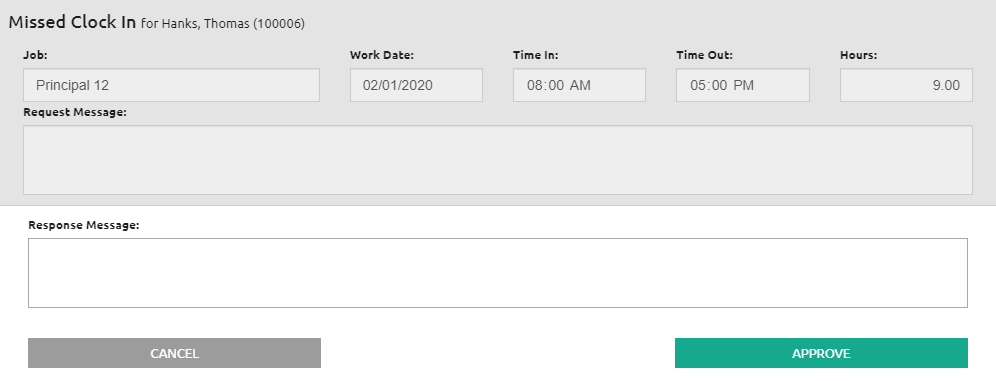
- Type a message in the Response Message text box. This is optional.
- Click the
.png) button. The request will appear as 'Approved' in Employee LINQ.
button. The request will appear as 'Approved' in Employee LINQ.
Approve Absence Requests
The Absence Request form requires more information than the forms for all other requests.
- Click the button. The Absence Request form will display. The request information is read-only and may automatically change depending on your edits.
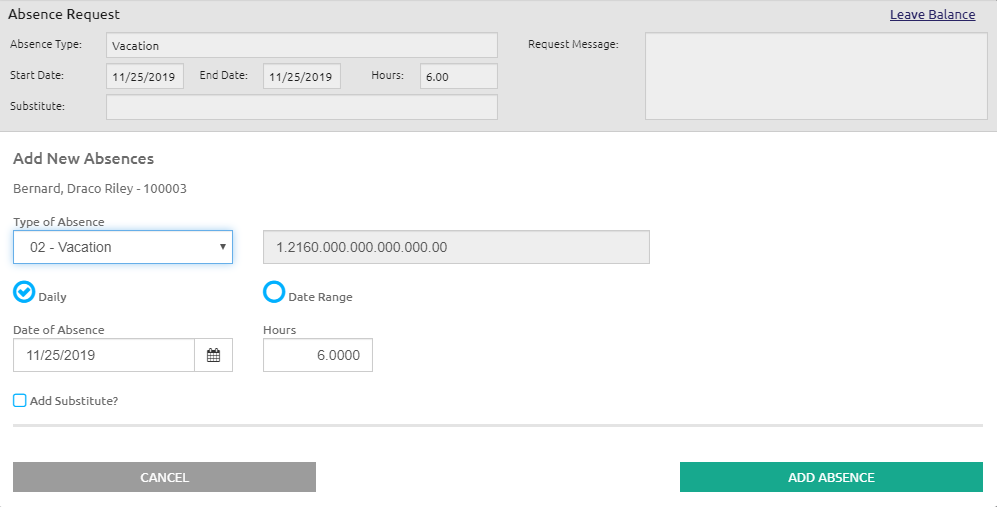
- Click the Leave Balance link to view the amount of leave available.
- The Type of Absence will populate automatically. This is editable.
- If Daily is selected, the Date of Absence field will populate automatically. This is editable.
- If Date Range is selected, the From and To fields will populate automatically. These are editable.
- Hours is populated automatically. This is editable.
- To add a substitute, check the Add Substitute? box. A new section will display.
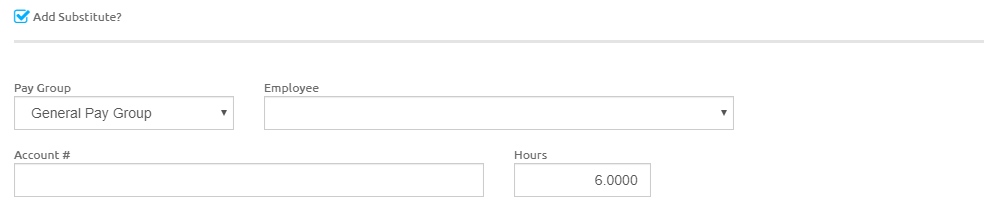
- Select a pay group from the Pay Group drop-down list.
- Select a substitute from the Employee drop-down list. The Account # will populate automatically.
- Hours is populated automatically. This is editable.
- Click the
 button. The request will appear as 'Approved' in Employee LINQ.
Deny Requests
The forms for denying requests are similar across all request types.
- Click the
 button. A new form will display. The request information is read-only.
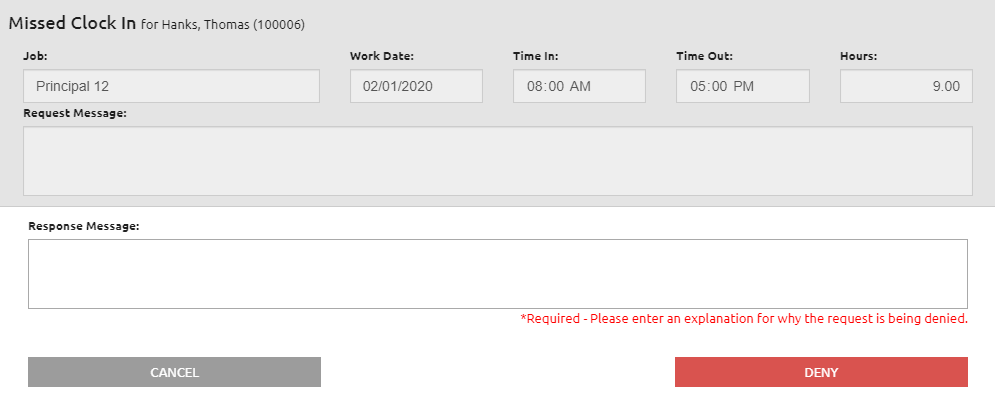
- Enter an explanation for why the request is being denied in the Response Message field.
- Click the
.png) button. The request will appear as 'Denied' in Employee LINQ.
button. The request will appear as 'Denied' in Employee LINQ.
©2021 | EMS LINQ, Inc.
School LINQ Help, updated 01/2021